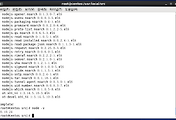
haproxy.cfg 의 주석 부분을 발췌하면 다음과 같다.
# to have these messages end up in /var/log/haproxy.log you will
# need to:
#
# 1) configure syslog to accept network log events. This is done
# by adding the '-r' option to the SYSLOGD_OPTIONS in
# /etc/sysconfig/syslog
#
# 2) configure local2 events to go to the /var/log/haproxy.log
# file. A line like the following can be added to
# /etc/sysconfig/syslog
#
# local2.* /var/log/haproxy.log
우선, syslog 파일의 SYSLOGD_OPTIONS 의 내용을 수정한다.
SYSLOGD_OPTIONS="-m 0 -r"
그런 후, /etc/syslog.conf 에서 생성될 로그 파일을 지정한다.
local2.* /var/log/haproxy.log
syslog 를 재시작한다.
/etc/rc.d/init.d/syslog restart
정상적으로 haproxy.log 파일이 생성되는지 확인한다.
CentOS 6.x 에서는 rsyslog 가 사용되며, 아래의 파일을 생성한 후 rsyslogd 데몬을 재실행한다.
vi /etc/rsyslog.d/haproxy.conf
$ModLoad imudp
$UDPServerRun 514
$template Haproxy, "%msg%\n"
local2.=info -/var/log/haproxy.log;Haproxy
local2.notice -/var/log/haproxy-status.log;Haproxy
local2.* ~
/etc/rc.d/init.d/rsyslog restart
'서버 > 리눅스' 카테고리의 다른 글
| node.js 설치하기 - CentOS 6.5 (0) | 2014.02.07 |
|---|---|
| root 계정에서 크롬 실행하기, CentOS (0) | 2013.12.31 |
| MySQL Cluster 7.1 Disk Data Storage 사용하기 (0) | 2013.06.05 |
| nginx load balancer 구축기 - Cent OS (0) | 2013.05.28 |
| MySQL Cluster 7.1 설치기 - CentOS 5.x (0) | 2013.05.28 |


댓글